Showing posts with label Recipes. Show all posts

Sunday, May 6, 2012

Asparagus and Mushroom Rigatoni Recipe


Jive Kitchen is back with a simple and healthy pasta from Runner's World. We cooked this pasta, replacing several stuff to clear our kitchen, most notable one is Rigatoni with Spaghetti.

Realizing that Asparagus and Shitake mushroom is the key ingredients, we tried to keep both in the dishes. Lucky for us that Sogo Food Hall sell both stuff with a good quality.

Another ingredients that we replace is Parsley with Italian Herbs, and Parmigiano Reggiano with Parmesan. While Sogo sell a good quality of Parsley, we don't want to buy bunch of it and ended up with using 1-2 stalk for decoration. Besides, we love the taste of Italian herb in the final result.

Quoting the recipe author about this dishes: "You get all the carbs without the cream or butter." Get the full recipe and instruction from Runner's World

Sunday, January 29, 2012

Cooking: Morrocoan Chicpeas Salad


I got bored with Thousand Island salad dressing, and when chatting with a friend about salad, he reccomend this salad. Turns out that this salad is very much worth the effort. For less than 1 hour, you get a spicy and refreshing salad.
The original recipe can be found in the link section below. Note that I can’t find the red onion, and I ommit the Foccacea. You can also find the picture of my salad in the link section below. For now, I would like to write about the exotic stuff, which contributes to the taste of the salad.
Cumin is popular in Mexican, North African, and Indian cuisine. The spice was formed from Cumin seed, which have a distinctive bitter flavor and strong, warm aroma due to their abundant essential oil content. Their smell can also be detected in the eater’s sweat even after consuming only small amounts. In Jakarta, you can find it in Diamond or Sogo Supermarket. Look at spice section. (Source: Wikipedia)
Feta Cheese is a classic curd cheese in brine whose tradition dates back to Greece thousands of years ago. It is made exclusively from goat’s and sheep’s milk. It give a tangy, salty flavor that can range from mild to sharp. It is one of the ingredients of Greek salad. In Jakarta, you can find it in Sogo Supermarket. Look at diary section. (Source: Wikipedia)
Lemon fruit, cultivated primarily for their juice, though the pulp and rind are also used, primarily in cooking or mixing. Lemon juice is about 5% citric acid, which gives lemons a sour taste. The fruit is available throughout many supermarket in Jakarta. (Source: Wikipedia)
Chilli gave the hot taste to the food. If you like the very hot one, put the chillies witht he seed, like what I did. For the purpose of food presentation, make sure you bought the big chillies in supermarket, not the small one sold in local market.
Garlic has a strong and characteristic odor and an acrid taste, and yields an offensively smelling oil, essence of garlic. (Source: Wikipedia)
Olive Oil is an oil extracted from the fruit of the European olive tree. It is regarded as a healthy dietary oil because of its high content of monounsaturated fat. (Source: Wikipedia)

Ingredients:
6 tbs olive oil
3 garlic cloves, sliced
4 tsp cumin, lightly crushed
2 red chillies, seeded, thinly sliced
1 can chickpeas, drained and rinsed several times
3 tomatoes, halved, seeded and thinly sliced
zest and juice of 1 lemon
1 foccacia (my favourite from Vineth Bakery), substitute with Turkish Bread or Indian Naan
½ pack Feta cheese
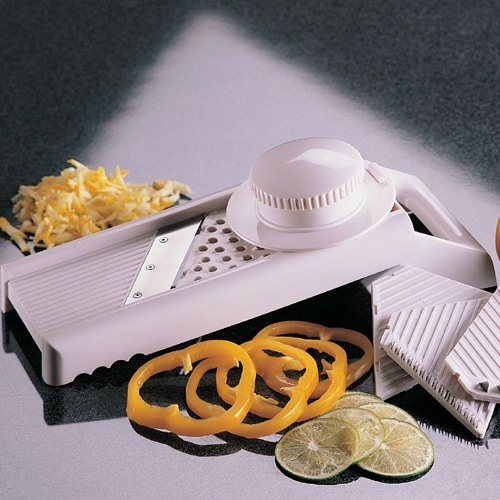
1 Cucumber, cut into thin batons (my Lurch Mandolin do it in no time)
½ Red Onion (NOTshallots aka brambang aka bawang merah), thinly sliced
1 cup shredded red cabbage


Directions:
- Put 5 tbs Olive oil in the pan, add garlic, chillies and cumin, temper (warm over medium heat for 10 minutes-don’t burn da thing , especially the garlic. Tempering is an Indian cooking method to release aroma from spices without cooking it.
- Add the chickpeas, warm through (5 mins)
- Add tomatoes, lemon zest and juice, set aside
- Brushed foccacia with remaining oil, grill or pan fried until crisp and golden, tear or cut with bread knife
- Toss remaining vegetable with chickpea mixture, topped with crumbled feta served with foccacia, enjoy with friend, in a porch with a glass of iced tea hmmm


Saturday, January 7, 2012

Cassava Leaves and Coconut Milk White Soup Recipe

The dishes came from the origin of my mom, Padang in West Sumatra. So it is not surprising that she often cook it during my childhood.

There are some variety of this food. In most of Padang Restaurant, or maybe in some waroong on the street, the most common one is with yellowish soup from addition of Turmeric (Kunyit). But the one made by mom was simply without Turmeric.

Here is the ingredients:
  • Cassava Leaves. Try to find the young small one that is softer when cooked
  • Coconut Milk. You need a thin one, so if you have a first press, mix it with some water.
  • Shallots, thinly sliced
  • Sugar to taste
After washing the leaves, put in boiling water for 2-3 minutes to dilute some of the bitter taste. Strain and replace the water with the coconut milk, then bring to boil with the leaves in . Add some shallots and sugar to taste.

The 2nd boiling time will mostly depends on how soft the Cassava leaves are. If the coconut milk gets to thick, then add more water

The dishes can be served hot or cold. I can't wait to taste mine, freshly made for the sake of memory.


Enhanced by Zemanta

Wednesday, December 1, 2010

Olive & Balsamic Vinegar Salad

A more healthier salad, compared to the last one, the Olive & Vinegar Salad doesn't contains any meat or cheese. The olive used is also supposed to be lower in fat than mayo-based salad. Thanks to Ranch Market for the inspiration

I tried 2 different mushroom preparation: raw and cooked with olive oil. Between those 2, a compromise is the best: dip the mushroom in the olive oil, but don't pan-fried it. As the mushroom soak, it will gain more taste.
Next on the dressing. My local groceries runs out of olive oil-based dressing, so I was forced to be creative. Put some olive oil, some balsamic vinegar, pepper, sesame seed, mustard, and there you have a mixture rich of taste. Good enough for me.
So, have another experimentation on salad? Have your own favorite mixture for dressing? List it in the comment, and we will try it out.

Tuesday, November 30, 2010

Wasabi Mayo Salad Dressing

Have too much Wasabi Tube leftover from the last Sushi cooking? Is it going to expire soon? Don't worry, this recipe will help you to finish it, along with some leftover vegetables in the fridge. In our case, it helps to finish off some Romaine Lettuce, Cherry Tomato, Olives, Carrot, Parmigiano Cheese, Smoke Ham, Almond and Sesame Seeds.
We compared between regular mayonnaise and Kewpie. The regular Mayonnaise come out too salty when mixed with Wasabi. So, we choose the Kewpie which come out better to our taste.
Mixing wasabi and mayonnaise is tricky. The wasabi taste does not come out during mixing, but when you spoon a mouthful of salad later on, the wasabi will kick hard to your nose.
We also put in some bread stick bought at Him Heang in Penang. Those crackers was supposed to be for coffee, but we are too lazy to make our own crouton. If you can get one, it would be great, but you can always bake your own crouton.
Dinner is finished with full stomach, and empty fridge happily

Thursday, November 18, 2010

The Energy Food: Baked Mini Potato with Cheese

One afternoon of a sunny day. We were having a late brunch, thanks to the holiday, which make us skip our lunch altogether. However, I planned to do 10k run on the evening, and in need of energy. A LOT OF ENERGY.

Rice is too boring and take time to prepare, plus all the dishes that follows. Potato become my option. To be specific, it would be mini potatoes for 2 reasons: It is bite size, and take shorter to prepare,compared to the bigger potato.

All these steps took less than 15 minutes preparation, and around 30 minutes of baking
  1. Wash the potato in running tap water, then cut them in half
  2. Pour olive oil in baking pan, and spread evenly. Arrange the halved potatoes on the pan. Don't forget to heat the oven to 180-200 degree. Put some pepper, salt or parsley to your taste
  3. Put the potato in the oven, and set a timer for 10 minutes. Sit back, relax, and enjoy your favorite TV show
  4. After 10 minutes, take out and stir. Place it back in the oven for another 1-15 minutes. Sit back and continue watching your favorite TV show
  5. After 10-15 minutes, take out and place in a serving plate made of ceramics (or something else that oven-save). Grate your favorite cheese on top of the potato. My favorite is Mozzarella to give some nice melt, and cheddar for the salty taste
  6. Put the potato and cheese with the serving plate back in the oven. This is the tricky part. You have to watch the cook so that the cheese melt, but not burnt. Sorry, no favorite TV show here
  7. Serve with tabasco or mustard. And you will have more than enough energy for your 10k run

Wednesday, May 5, 2010

Vegetables Series: Manado Papaya Buds

Unlike myself, who can eat same vegetables from day to day, week to week,month to month, she will be bored to dead. Fortunately, before that happens, her creativity kicks in. Combining leftovers in the fridge, she cook this Manadonese traditional dishes: Stir Fry Papaya Buds with corn. Is is spicy, hot, salty, slightly bitter, and ultimately refreshing.


This food can be found in almost all of Manado Restaurant in Jakarta. Yet, making it yourself is simple. Just stir fry in particular order: garlic, shallots, corn, chill, boiled Papaya Buds, Lemon Basil, precooked Anchovy. The dishes should be slightly oily, so add some more generous oil if needed.

It took less than 30 minutes to prepare, and 15 minutes to cook. Best eaten with steamed rice

Sunday, July 26, 2009

Fried Champignon Mushroom

Due to canceled recipe from last week's cooking session, I have a lot of Champignon Mushroom leftover, sadly starting to rot inside the fridge. "Why not fry it with ready-made flour for frying Chicken?", Kiko gave a suggestion.

I have another devilish idea in mind when stumbling upon a pack of Flour that near its expiration date, and a pack of new Rice Flour. The soft fried Tempe Mendoan with thin soft flour coating sounds better than ready-made Chicken flour. Half from googling, the other half is from follow-your-instinct, I started mixing the following ingredients:

  • 1:1 Flour and Rice Flour
  • Salt, pepper
  • Scallion, chopped
  • Water
As you can see, the only measurement did was the 1:1 Flour vs. Rice Flour. Other are added based on follow-your-instinct thing (or maybe follow-your-taste would be more appropriate).

The Mushroom is then chopped, dipped into the mix, and fried in hot oil. Some might prefer crisp fried, but I prefer soft fried - when it start to turn brown, strain.

Thankfully my taste was properly tuned this evening. The overall result made me wished to have a piece of Tempe Mendoan to be fried with the leftover flour mix. Hmmm..... maybe next week?

Thursday, April 30, 2009

Comfort Lasagna

I used to cook bolognaise sphagetti in my school years. The recipe taken from my cousin, adopted Indonesian version of bolognaise sauce : tangy, slightly sweet and cheesy. Seeing lasagna sheet on supermarket rack always encourage me to think if someday i will have the time and passion to cook this dish. One day i hook on San Remo Instant Lasagna and read recipe behind the pack. The ingredients quite similar to bolognaise sauce but the most important thing is you can use lasagna sheet without boiling first like usual. I said to myself the recipe worth trying as it sound quite impressive. Few times trying this at home, the recipe never fails. So here’s San Remo version of lasagna with little modification :

Instant Lasagna with Meat Sauce
Serves 5

•250g San Remo Instant Lasagna

Meat Sauce
•3 tablespoon olive/vegetable oil
•1 medium onion, finely chopped
•1 clove garlic, crushed
•500g beef mince
•400 gr canned tomato
•100 ml tomato sauce/ketchup
•4 fresh medium tomato, chopped
•2 cups chicken stock
•2 pack (150 gr) champignon mushroom
•100 gr cheddar cheese, shredded
•Oregano, dried bay leaf, salt, pepper and pinch of nutmeg

Cheese Sauce
•2 tablespoons butter
•2 tablespoons plain flour
•2 cups milk
•Salt, pepper
•125g mozzarella cheese (cubed or grated)

Meat Sauce
Heat oil in a medium saucepan, add garlic and onion until soft cook. Add mince and cook stirring, until brown. Add mushroom and stir in chopped tomato, tomato sauce and tomato paste follow with chicken stock. Put few bay leaf and season with crushed oregano. Season with salt, pepper, nutmeg, and shredded cheese. Cover and simmer gently for 20 minutes, stirring occasionally.

Cheese Sauce
Melt butter in medium saucepan, stir in flour and cook for 2 minutes over gentle heat. Remove from heat and gradually stir in milk. Return to heat and stir until thick and smooth. Season with salt and pepper, add mozzarella and stir over low heat until cheese melts.

Lasagna
Preheat oven to 180ºC. Pour 125ml meat sauce into base of lightly greased baking dish. Alternate layers of lasagna, meat and cheese sauces, ending with cheese sauce layer. Sprinkle top with grated parmesan cheese if desired. Bake in oven for 35 - 40 minutes. (Test by pricking with fork) Let stand 5 - 10 minutes before serving.

Happy baking! I wonder if Garfield is around the town...

*San Remo website : http://www.sanremo.com.au

Friday, January 30, 2009

Fried Pastel

Among the favorite snacks i used to hunt when stopping at cake kiosk on traditional market are kue dadar (rolled pandan pancake with coconut and sugar filling), kue lapis (traditional layer cake made from rice flour), risoles (rolled pastry with ragout filling), pastel (wrapped fritters with fillings), kroket (local version of croquette), various puddings, and sometimes kue talam (nyonya rice cake). Those yummy things are perfect for weekend breakfast appetizer. Sometimes, there are days when i craved for fried pastels with sambal kacang (peanut chili sauce) in unlimited batch. That time i would beg mom to practice her recipe for me to nibbling.

This long weekend, after pausing for weeks, we would like to returned to kitchen and tried some pending recipes. I was searching mom’s sacred book recipe for pastel ingredients but could not located exactly. Lucky we have powerful google guru’s anyway. Few things i remembered from the mom’s recipe were i did not like the texture of the dough for it was crunchy after frying but just last for hours. The flour type might contribute in evoking the crunchy texture so i decided trying another flour usually used for making bread and noodles. The recipe was tweaking between my memories and the browsing recipes.

Served : 15 pcs

Dough

250 gr flour (high gluten preferable)
50 gr margarine
80 ml water
½ tsp salt

Filling
2 pcs potato
5 pcs carrot
250 gr fillet chicken breasts, diced
2 boiled eggs (cut thins)
1 clove garlic, chopped
1/2 pack glass vermicelli, soak in water first
Nutmeg to taste
Pinch of Salt
Cooking oil

1. Diced half steamed potato and carrot separately. Heat frying pan, add oil and garlic follow by diced chicken and fry for 2-3 minutes until lightly coloured. Reduced heat, add potato and carrot. Stir in salt and nutmeg, follow by soak glass vermicelli. Sauteed until well done.

2. Mix the flour with margarine and salt first in larger bowl, then add water gradually until the mixture forming a ball. Knead for about 2-3 minutes, until the dough is smooth and no longer sticky.

2. Flour a work surface or counter. Gently pick quite amounts from the dough, and start knead with rolling pin until thins.

3. Use your small bowl or any circle objects between 4” to 5” diameter as dough cutter.

4. Place the wrapper flat in the palm of your hand, then using your other hand place 2-3 tsp of the filling mixture into the centre of the wrapper together with sliced boiled eggs. Bring the sides together to form a half moon shape and pinch the seam firmly to seal it in a pleat. The pleat style needs a lot of practice but you can use regular molding for easier pleat.

5. Deep fried, and served.

This time high gluten flour works better, no splitting dough and gives extra chewy texture to the wrappers without losing its crunchiness. Another thing, the surface looks more smooth without any crack or bubbling. I prefer this new recipes, and might try another practice later on.

For Sambal Kacang sauce :

Fried peanut
Sugar
Salt
Lemon
Ground chili

Blend the peanut until well managed, add sugar, salt, lemon and ground chili together. Served.

Sunday, December 14, 2008

Now Tossing: Pizza Dough

Today is the new milestone of my pizza chef career. This evening, I made several successful pizza dough toss for the first time. It flew up in the air, circles, and landed on my palm. This Youtube Video gave the inspiration on how to learn to toss pizza. And to avoid waste pizza landing on the floor, I practice by tossing a small bath towel :D.

While it is pretty easy to learn the technique of pizza tossing from the video, and using towel as a safe learning tool, making a good pizza dough that is toss-able will test your patience. It is a matter of making the right dough, that elastic enough, thus would not tear when it lands on your hands. Experience will tell you the right mix of water and flour. And if you have to error, error on the wetter side, because the mix will dry up during the kneading process.

This is the dough that marks my new milestone. It was only 1/3 of its size when I finish kneading it last night. The tile under the plastic container is 30x30cm.


The tossed pizza dough soon become 3 nice pan of pizza: The Quattro Formaggi, Sweet Corn, and Cocktail sausage pizza.


This is the recipe I follow for the dough, thanks to Rosa for allowing me to repost her recipe. A little bit modified based on my experience.

~ BASIC PIZZA DOUGH ~
Original recipe taken from “The Bread Baker’s Apprentice” by Peter Reinhart.

Makes 6 pizza crusts (about 9-12 inches/23-30 cm in diameter).

Ingredients:
4 1/2 Cups (20 1/4 ounces/607.5 g) Unbleached high-gluten (%14) bread flour or all purpose flour, chilled
1 3/4 Tsp Salt
1 Tsp Instant yeast
1/4 Cup (2 ounces/60g) Olive oil or vegetable oil (both optional, but it’s better with)
1 3/4 Cups (14 ounces/420g or 420ml) Water, ice cold (40° F/4.5° C)
1 Tb sugar - FOR GF use agave syrup
Semolina/durum flour or cornmeal for dusting

  1. Mix together the flour, salt and instant yeast in a big bowl
  2. Add the oil, sugar and cold water slowly and mix well (with hand) in order to form a sticky ball of dough. On a clean surface, knead for about 5-7 minutes, until the dough is smooth and the ingredients are homogeneously distributed. If it is too wet, add a little flour (not too much, though) and if it is too dry add 1 or 2 teaspoons extra water. If you are in doubt, error to the wetter side.
  3. Once it is well mixed, start kneading. Pull the dough and fold, repeat until the dough springy, elastic, and less sticky
  4. Flour a work surface or counter. Line a jelly pan with baking paper/parchment. Lightly oil the paper.
  5. Split the dough into 6 pieces. Gently round each piece into a ball.
  6. Transfer the dough balls to the lined jelly pan and mist them generously with spray oil. Slip the pan into plastic bag or enclose in plastic food wrap.
  7. Put the pan into the refrigerator and let the dough rest overnight or for up to thee days. Take it out from freezer the morning you want to make the pizza, and let it rest for couple of hours before start tossing it
  8. NOTE: You can store the dough balls in a zippered freezer bag if you want to save some of the dough for any future baking. In that case, pour some oil (a few tablespooons only) in a medium bowl and dip each dough ball into the oil, so that it is completely covered in oil. Then put each ball into a separate bag. Store the bags in the freezer for no longer than 3 months. The day before you plan to make pizza, remember to transfer the dough balls from the freezer to the refrigerator.

Thursday, November 13, 2008

Quiche Lorraine : The Guilty Pleasure

I still remember the shabby old patisserie on one famous shopping centre in the old days where I used to hang around after school. This shop quite small with 2-3 round table for coffee cupping and usually deserted. People preferred to take away their pastry instead of sitting down and have chit chat. The display itself was my own feast -young girl with much appetite- : danish pastry with peach, plain croissant, fruit pie, chicken curry pie, strawberry danish, quiche lorraine, etc etc. But the “buttery” smell along the alley gave extra pleasure for me, like my cat when driven by her whiskas pouch dinner.


Instead of buying their famous croissant, I fell in love with the quiche. Small flan pastry, yellow tone with brown spots, the appearance made me drooling already. The creamy taste filling and ham strips combine with delicious outer crust pie made my first bite lasts forever until now. From that time, I used to search or scanned any quiche lorraine displayed when visiting other pattiserie or bakery shop. And I could not find any better than theirs. Some of the pastry maker now bake them unproperly, either too soft or too crusty. And the most intolerable thing: substitute proper cream.

In search of the original one, I pledge myself to explore the recipe from my cookbooks on shelf. Our first quiche turn into overcooked pastry flan. As written, gas marked on 180 C and turn out baking time extended to almost an hour with the overcooked result. We suggest you to set the temperature 200 or 220 C to speed up the process. The tricky parts lies on how to lining perfect pastry over the base. It is one of most important thing because if you failed, the cream mixtures will flow all over the base.

Quiche Lorraine

This open tart originated in the Lorraine region around 16th century. The name quiche come from the german word “kuchen” meaning cake. A quiche can contain many fillings but a quiche lorraine is traditionally made with cream, egg, smoked bacon and is considered a classic of french cuisine

Prep time - 30 min
Cooking time - 1 hr 5 min
Serve 4-6

½ quantity shortcrust pastry (separate recipe)
1 egg beaten

Filling

Oil for cooking
180 g smoked bacon, rind removed and cut into thin strips
3 eggs
Nutmeg to taste
250 ml cream
80 g gruyere cheese grated

1. Lightly grease a 22 x 3.5 cm loose bottomed flan tin. Roll out the dough on a lightly floured surface to a thickness of 3 mm and line the prepared thin. Preheat oven to moderate 180 C, bake blind for 25 minutes or until firm. Remove the beans and paper, and brush the bottom of the pastry with the beaten egg. Bake for another 7 min.
2. To make the filling, heat a little oil in a frying pan. Saute the bacon, drain on paper towels and set aside. Whisk the eggs with the nutmeg and season with salt and pepper. Mix in the cream and strain throuh a sieve.
3. Sprinkle the bottom of the pastry with the bacon and cheese. Gently pour in the egg mixture until the pastry is three quarters full. Bake for about 20-30 minutes or until the filling is well coloured and is set. Serve hot.

Although we have to learn more to lining proper pastry crust, the taste resembles of guilty pleasure kind. Creamy, buttery, with legitimate smoky ham. Bon appetite!

Sunday, October 5, 2008

For The Love of Gyoza

Try serving a full plate of moist- neat pleated-oily-good smell of gyoza in front of us. Believe me, for less than 10 minutes you’ll find clean plate without any favor to wash. In Chinese dishes, we recognize similar dishes called Guo Tie, another long time favourites. My friend told me once, the difference between gyoza and guo tie was the filling. If guo tie consists more meat, then gyoza should reserved more vegetables. You can find another guo tie recipes from here.


I still remember my gyoza served with jigoku ramen at Ramen 38, a specialty ramen restaurant in Jakarta. Dipped in vinegar, ginger, and soy sauce, the smell and taste successfully hit me off . Later on, another free flyer gyoza recipes hanging on supermarket rack. I was mumbling to myself, why not? Fortunately when browsing through my finger food book, the recipes was also there so I tried to compare both and practice the combination. Here they are :

Prep Time : 30 min
Cooking Time : 15 min
Makes 35 - 45

250 gr pork mince
250 gr finely shredded and lightly blanched Chinese cabbage with the excess water squeeze out
60 gr fresh leek (or japanese chives: daun bawang wakegi)
1 tbsp finely chopped fresh ginger
¼ cup (60 ml) soy sauce (i used konbu-tsuyu --> see next pic)
1 tbsp rice wine
1 tsp sugar
35 – 45 gow gee wrappers (here you can find the gyoza wrappers in large hypermarket or japanese supermarket)
2 tsp ra-yu (japanese chilli & sesame oil)

Dipping Sauce
2 tbsp soy sauce
1 tsp black chinese vinegar
1 tsp ra-yu

  1. Place the pork mince, chinese cabbage, leek/chives, and ginger in larger bowl and mix together. Add the soy sauce, rice wine, sugar, ra-yu, and salt (if necessary-remember: soy sauce is salty enough) to the mixture and mix together very well.
  2. Place a gow gee wrapper flat in the palm of your hand, then using your other hand place 2 tsp of the filling mixture into the centre of the wrapper. With wet fingers, bring the sides together to form a half moon shape and pinch the seam firmly to seal it in a pleat. Press one side of the dumplings onto a flat surface to create a flat bottom. This will make the dumplings easier to pan-fry.
  3. Heat the oil in a frying pan over medium-high heat. Add the gyoza to the pan in batches and cook for 1-2 minutes on the flat side without moving, so that the gyoza become brown and crisp on that side. Gradually add 100 ml water to the pan and put the lid on. Steam for 3-5 minutes. Empty the pan and wipe it dry between batches.
  4. To make the dipping sauce, combine all the ingredients in a small bowl. Serve with gyoza.

Our Tips :
  1. Meat vs vegetables at least 1 : 1. You may add more vegetables if you wish (1 : 1,5)
  2. You can make the filling a day before assembling the dumplings. Keep it on the freezer and it will lasts up to 3 months.
  3. Blanching the cabbage also make it very watery. My mom suggest to chopped without blanch to minimize the excess water.
  4. Be careful on timing to avoid overcook wrappers.
Good luck and have a nice practice!

Friday, October 3, 2008

Farfalle with Prosciutto and Parmesan

This simple pasta dish makes the most of two of Italy’s most famous ingredients – prosciutto, a salt cured ham, and the rich, grainy parmesan. As both of these ingredients are salty, particular care should be taken when seasoning this dish.

Yes, it is a simple dish, and offers impressive combination between rich creme fraiche and flavor of parmesan, so why not dare to try? If you lack of prosciutto, try streaky bacon and smoked ham for substitution.

I have practice this recipe few weeks ago to explore the taste and share a good lunch (although the zabaglione recipe failed, sorry Scal). Rather than liquid cooking cream used for carbonara or alfredo sauce, cream fraiche gives lighter after taste. Pick some rich or fresh starters like bruschetta with parma ham, chorizo tapas, or tomato and balsamic salad.


Prep time 20 min
Cooking time 20 min
Serves 2 – 3
(Recipe in half, original was doubled)

3 tbsp olive oil
200 gr farfalle (pasta bows)
1 large onion, thinly sliced
100 gr mushroom buttons (champignon will be fine), thinly sliced
1 large zucchini (courgettes), cut into batons
1 clove garlic, chopped
75-100 gr prosciutto (I used streaky bacon+smoked ham), cut into strips
150 ml crème fraiche
50 gr parmesan, grated
Fresh basil leaves, to garnish

1. Bring a large pan two-thirds full of water to boil. Add a good pinch of salt and add farfalle to the bubbling water. Stir with a fork and cook according to manufacturer’s instructions until the pasta is al-dente. Pour immediately into a colander then refresh under plenty of cold running water. Leave to drain until needed.

2. Heat a pan over high heat and add the olive oil. When the oil is hot, add the onion, garlic, mushroom, zucchini, and fry for about 2 minutes, or until the vegetables are lightly coloured. Reduce the heat, add the prosciutto strips and fry for 2-3 minutes. Stir in the crème fraiche and heat the mixture for another 1-2 minutes. Stir in the grated parmesan and season to taste with salt and freshly ground black pepper.

3. Add the pasta to the pan, stir to combine and cook briefly to ensure the pasta is heated through. Serve immediately with the fresh basil leaves sprinkled over the pasta.

Happy meal, everyone :)

Raise and Fall: Lusciously Classic Italian Tiramisu

Hello, I’m back now. And pleased to report no such satisfaction rebound once you complete the lesson you have started. All the hassles began with Le Cordon Blue recipe book series when we were looking for simply pasta and suddenly hooked on this tiramisu picture. How could you not fall for quick preparation time, and all you have to do is mixing, dipping, and chilling. So simple, eh? You bet, but there are always tricky step on every recipes.

On 1st attempt we mixed the whipped cream for quite a long time without really understanding the meaning of “stiff peaks”. There goes the blow out, cream separated into water and the whole mixture become crumbly. Oh well, no further choice, we’d have to taste it anyway since making a new one was far beyond expectations. Few hours chilling, and we scoop our spoon onto. Hmm, the taste was less awful than its appearance. Coffee, kahlua, sugar, cheese and broken cream were blended together.

On 2nd attempt, fear of another failure, I tried to beat the cream carefully and still have no idea of stiff peaks forming. Only when the cream began to rise I stopped the mixer and start fold the mixture at once. The result? It became very soft even after chilling. A big grin decorated our faces, now we have tiramisu ice cream instead the real one. Oh, who cares, the taste was still finger lickin’ good anyway.

The 3rd revenge took place last couple week after long pause. Still unsatisfied and wondering how to deal with “stiff peaks” after googling on trial and error suggestion from many recipes tested. Differences between raise and fall were as thin as hair. You just have to managed your eyes and dip your finger into the cream to make sure the stiff peaks have forming. And, your experience never lied then.

Now we have passed the exam and happy with the results. This classic recipe was definitely superior and indulged everyone, and we still promise to make another tiramisu. For our pleasures, or never ending satisfaction to create a good and fancy one.

Classic Italian Tiramisu
(From Le Cordon Bleu Home Collection: Italian)

Layer of sponge biscuits soaked in coffee and kahlua, rich mascarpone cream and a generous dusting of cocoa powder have contributed to the enormous success of this dessert today

Prep time 35 min + chilling
Total cooking time : nil
Serves 4-6

3 egg yolks
120 gr (4 oz) caster sugar
180 gr (5 ¾ oz) mascarpone
300 ml (10 fl oz) cream, for whipping
3 tbsp kahlua
500 ml (16 fl 0z) strong coffee (espresso required), cooled
36 sponge finger biscuits
cocoa powder, for dusting

1. Beat the egg yolks with sugar until the sugar has dissolved and the mixture is light. Add the mascarpone and mix well. Beat the cream into stiff peaks and gently fold into mascarpone mixture, then spread a thin layer of the mascarpone cream over the base of a deep 35 cm (14 inch) oval dish.

2. Add kahlua to the coffee. Dip the sponge fingers into the coffee, soaking them well. Depending on the freshness of the biscuits they may require more or less soaking, but be careful not too oversoak. Arrange a layer of sponge fingers close together in the dish – you may need to break them to fit the shape of your dish. Cover with another layer of the mascarpone cream, then another layer of sponge fingers, arranging them in the opposite direction to the first layer. Repeat the layers finishing with mascarpone cream. Smooth the top and keep chilled until ready to serve. Generously dust with cocoa powder just before sevring. Tiramisu is best made several hours in advance so that the flavours have time to blend before serving.


Our tips:

  1. The recipe measurement was proven, so better stick to the recipe in details.
  2. The whipped cream must be cold enough when mixed to avoid splitting. Better chilled first, but not frozen.
  3. Be very careful when whipping the cream and forming “stiff peaks”. You just have to learn to notice, dip your finger to taste it. When you beat too much the cream will split into water and cream.
  4. Some recipes would suggest non dairy cream or powder one for anti failure potion.
  5. Do not tempted to use instant coffee. Have an extra worth miles by using fine espresso.
  6. Do not dip the sponge finger too long otherwise your mixture will be very watery.
  7. We use around 24 sponge fingers for the whole recipes.
  8. Better serve the tiramisu next day ahead or at least chilled for 12hrs to acquire better taste.
  9. Classic tiramisu usually served in glass, or thin dish. If you expect to make the fancy one like those pattiseries used to, search another recipe using gelatin for hardener.


Enjoy your luscious tiramisu!

Wednesday, September 3, 2008

The 2 in 1 Tomato Soup

Although I insist that it would be safer for us to buy instead of cooking our own tomato soup, she insist me to promise to cook her one. So finally last week I keep my promise, and use Jamie's recipe posted by Venny in her blog. Since there are only 2 of us, not to mention other recipe tried that day, we cut the recipe into half. Here is the result:


We put the soup from the recipe to a blender, then strain to obtain smoother texture. The result looks convincing, except that we got only 1 small cup instead of 3. Then here all the laughter came.

First, the soup smell more to sambal balado (Padang's Cuisine), and taste like one. We can still trace the taste of the tomato, though, and she said that it taste good, but I still think it reminds me of sambal balado. I think somehow I cut wrong amount of red pepper and chillies from the original recipe

And when we see the residue on the strainer, we almost rolling on the floor laughing. It reminds us to chili for Ayam Pop, another Padang's cuisine.

Fortunately the soup is still edible, and does not cause any side effect so far. And hopefully she now agree that it is better to buy rather than my version of tomato soup :D

Sunday, August 3, 2008

Cooking Week : Potato & Feta Pancakes

Clean up time! Making and testing several recipe leave some leftover in the fridge, among them are 2 packs of feta cheese. We decided to find any recipes using this ingredient. Browse from VideoJug, here they are:

Potato & Feta Cheese Pancakes
Serve for 2

500 gr Potatoes
50 gr Onion
2 Eggs
2 tbsp Parsley
60 gr Feta Cheese (mashed & crumble with fork/spoon)
60 gr Flour
Pinch of salt & pepper
4 tbsp Olive Oil
1 Lemon Wedges (for garnish)

Grate all potatoes with your mandolin, put in another bowl or colander then squeeze grated potatoes with your hand until dry. Chop the onion, mix with potatoes and season with salt and pepper. Add eggs and chopped parsley, then put crumble feta and flour, mix well.

Heat the olive oil in non sticky frying pan over medium heat. Cook the mixture in several batches, gently tossing in the oil until golden brown. Drain on crumpled paper towels. Served with lemon wedges (if necessary).

Some modifications done:
Another 20 gr feta was added and black pepper replaced the white one. Slices of smoked ham included. The results turns out great, grated potato still moist inside and crumbly feta just melted in your mouth.

We are still figuring out the best companion for this recipe. Serve over breakfast with warm cheese sauce? Or mushroom sauce, or sour cream? Or maybe just use it for pancake dough and spread four different cheese topping? Ummm, we’ll let you know later :)

Thursday, July 31, 2008

Gochisou-sama Deshita

"It was a feast!", the direct translation of the Japanese expression in the title of this post. It is usually said as appreciation when someone has a very good dining experience. When we taste our homemade sushi, we definitely have to say Gochisou-sama deshita to each other.

Sushi is one of the most complex food to really feast on. A good fresh sashimi is not enough when enjoying a plate of sushi. The term sushi means vinegared rice, which state the importance of rice for sushi. Finding a restaurant which is able to served the best sushi rice and sashimi is one in a zillion. So we decided to give it a try to make a proper sushi rice.

We trust our sashimi source to Sakura Restaurant, where we ate few months ago and happy with the salmon & maguro sashimi. Also thanks to a friend, we know which rice are good, a good vinegar, and the correct way to make sushi rice. The whole process took around 3 hours, from soaking the rice for 2 hours, cooking it in rice cooker, mixing with rice vinegar, then shape it to form nigiri sushi, topped with fresh sashimi.

The result is sushi feast enough for the day. The sushi rice is sticky enough without losing its texture when formed into nigiri. The rice vinegar need some tweaking by adding pinch of salt and ordinary vinegar to neutralize its sweetness. The thin layer of wasabi and slice of maguro/salmon give a real feast to your taste.

We are even more happier when we see the bill. The whole experience cost less than 1/4 of a decent meal at sushi restaurant. Plus that we have 2 meals instead of one.

Our Sushi Rice (Su-Meshi) Recipe
makes +/- 20 pcs

  • 1,5 cup Japanese Rice (Kokuho)
  • 3 tbsp Sushi Su (Japanese Sushi Mixture)
  • 1 tbsp Vinegar (we used distilled white vinegar)
  • Pinch of salt
  • 75 gr chu toro (maguro)
  • 75 gr sake (salmon)

Direction

  • Soak the rice 2 hours in advance, then bring to cook using rice cooker. Water vs rice should be 1 cup rice : 1,2 cup water.
  • When cooking was done, plug off the cable and start mixing the rice with sushi su, vinegar, and salt evenly to fold all mixture into the rice. Close the cooker lid and wait for 10 minutes.
  • Spread the rice strictly over flat wooden base (we used “tampah” anyway) and let cool off. Start forming the rice with your hand comparing to fish size.
  • Rub a small dab of wasabi over the rice, and press the fish firmly onto the rice. Served.

Tips

  • If the rice sticks to your hand, wet your hand with mixture of water and white vinegar.
  • Don’t worry if your su-meshi don’t look very neat. It takes at least 2 years practice in sushi kitchen restaurant.
  • Trust yourself, and enjoy your try out.
  • Wasabi should be assumed to have a very strong flavor unless otherwise proven (Translation: don't put too much wasabi between the rice and sashimi)

~~~~ Gochisou-sama Deshita ~~~~

Sunday, July 27, 2008

Baked Corn Fusili Pasta

I'm scratching my head this morning trying to understand this recipe. One question left unanswered is, how can they made the fusili stick together when baked? Traditional macaroni schotel use egg yolk as the binding agent. Other use mozzarella. Counting on faith, I scramble around the rack in Sogo Food Hall and Farmers Market for the ingredients. Here it goes.....


  • 200 gr Macaroni Elbow (I replaced this with Fusili)
  • 1 Onion
  • 2 tbsp Frying Oil
  • 2 medium sized corn, boiled
  • 100 gr Cheddar Cheese, cut into small cube (shredded might be better, so it mix better with the rest of the ingredients)
  • 200 ml Plain Yoghurt
  • 50 ml Thick Cream
  • 1 tbsp Italian Seasoning
  • 150 gr Smoke Beef, cut into small square
  • 2 tbsp Parsley
  • 2 clove of Garlic
  • Salt and pepper
Sautéing Corn Cheese Sauce
  1. Sauté the garlic, then onion, and smoke beef until sizzle. Pour in cream, yoghurt, corn and season with Italian Seasoning. Cook under low flame until boiled.
  2. Put in cheddar cheese (This is where I think my mistake was. I should wait until the cheddar melt, so that it can bind the fusili when baked)

Baking The Pasta
  1. Boil the fusili until al dente
  2. Arrange the macaroni (or fusili) in a baking pan, 2-3 cm thick. Then pour the corn cheese sauce on top. Sprinkle the parsley
  3. Put the pan into pre-heated oven (200 Celcius) until it dries
  4. Share the results with the whole family

Sunday, July 20, 2008

Cold Pasta Salad

Pasta and cheese.... hmm.... a combination that is hard to resist, even when it is in form of letters, numbers and photos in recipe book. Especially when it took only 30 minutes to prepare, over an evening coffee session. Any other objection?


Ingredients:
  • 200gr Fusili Pasta
  • 2 Red Tomatoes
  • 150gr Broccoli
  • 100gr Cheddar, grated (Optional)
  • 250gr Smoke Chicken (I run out of stock, and replace it with chicken burger meat instead)
  • 3 tablespoon Extra Virgin Olive Oil
  • 1 tablespoon Lemon Juice
  • 2 shallots, coarsely minced
  • 4 tablespoon Mayonnaise
Direction for dressing:
Mix Mayonnaise, Olive Oil and Shallots into mixing bowl, then stir. Keep it in cold in the fridge until ready to serve

Direction for pasta mix:
  1. Cook the Fusili until Al Dente, and dry
  2. Boil the broccoli
  3. The tomatoes should be unseeded, and the sliced to your taste. I like to cut it into square
  4. Smoke chicken (or in my case, chicken burger meat) should be cut into square
  5. Then store them all in the fridge until ready to serve
Direction for serving:
  1. I like to arrange the fusili as the base, broccoli circled above the fusili, and then the smoke chicken and tomatoes mixed in the middle
  2. Pour the dressing, and topped with grated cheese (Note: I forgot the cheese once, and it still taste good. Thus, I put the cheese as optional)
  3. Take your spoon and fork, taste it, and invite me for a dinner :D
Recipe translated from Menu Magazine